Aquaponics set design & plan
Selasa, 27 Mac 2018, 5:02 pm
There are a few factors that attract me into aquaponics, and I like it mostly because of the fact that I can harvest both fishes and vegetables from a single system. When doing conventional farming, I can only do planting, and it requires back-breaking work, from creating the patches, transplanting, fertilizing, weed control, pest control until harvesting. There are a lot of energy and time to put into it, but not enough outcome to be sold commercially.
So for this aquaponics set, I’ve been learning about it for a few months from The School of Aquaponics Youtube channel. In this channel, the instructor focuses a lot on UVI method, where I can summarize it as, to focus on feed to grow area ratio: amount of feed to be given to the fish is 3% of total fish body weight when they are fingerling, up to 60-100g per day per square meter (g/day/m2) of grow area when the fishes are grown up, with optimum fish stocking density of 60 kg per cubic meter of water (kg/m3).

My aquaponics set design
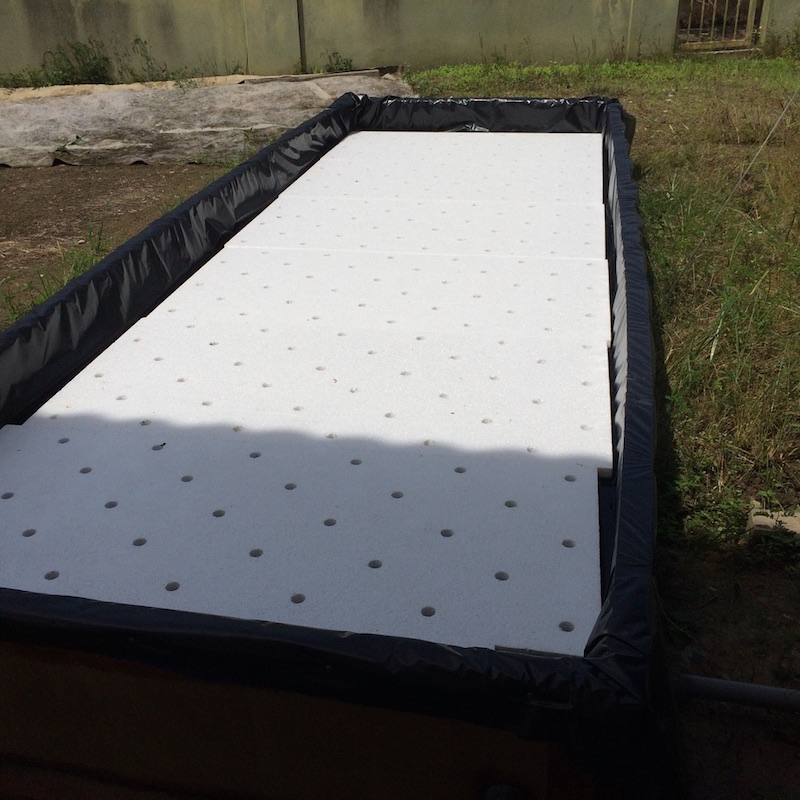
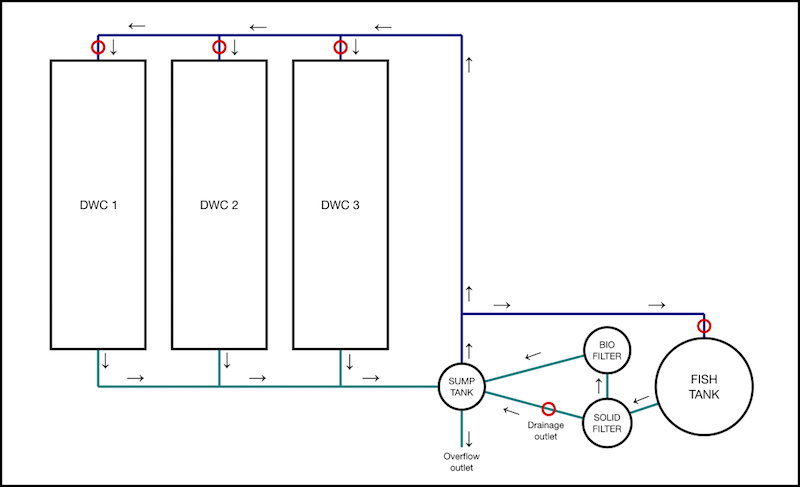
There are a few other types of grow area, such as NFT (nutrient film technique) and media-filled grow bed, but I choose DWC (deep water culture) since it is the easiest to use and results in high yield. This DWC will be 1 feet deep, covered with netting to prevent pest and to reduce pesticide usage, and also for shade from excess sunlight. There are 3 DWC, each has size of 4 ft by 12 ft, and total of 144 ft2 or 13.5 m2. Each DWC will have 2 small air stone to increase dissolved oxygen in the water.
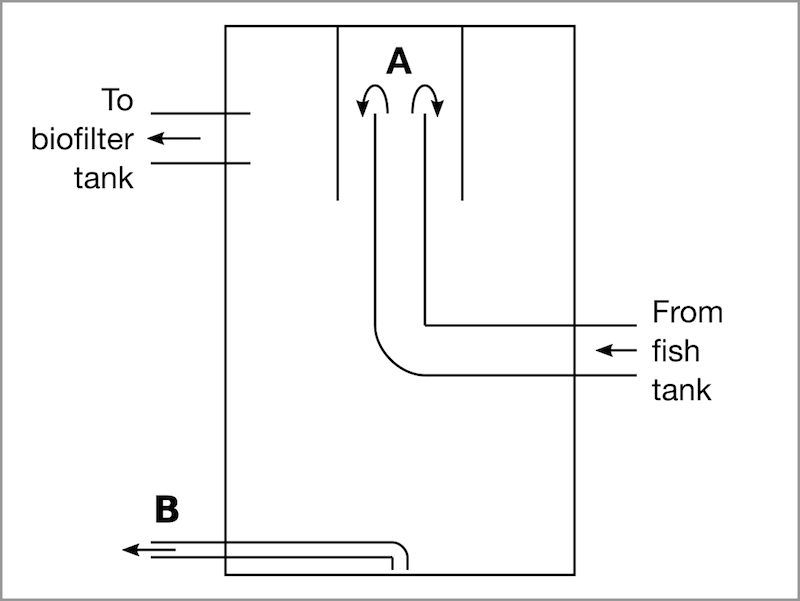
Fish tank that I’ll be using is a 1000 liter PVC tank, with maximum of 200 fishes, and feed rate of 900 g/day (for tilapia). To accomodate this high stocking density, I’ll have two medium size air stone inside it to supply dissolved oxygen. Pressurized water from pump inside the sump tank will be used to create circular flow inside the tank, where solid waste will gather in the middle, and I’ll use solid-lifting-overflow method to suck the waste out of the tank, into the solid filter.
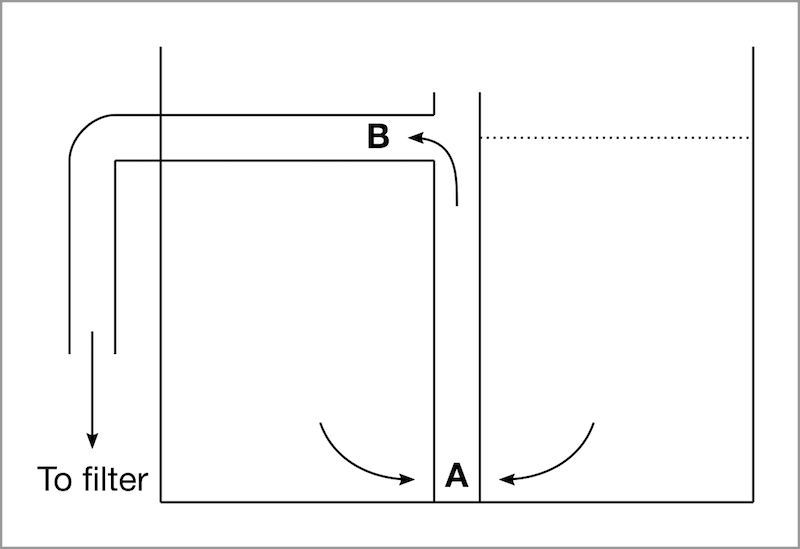
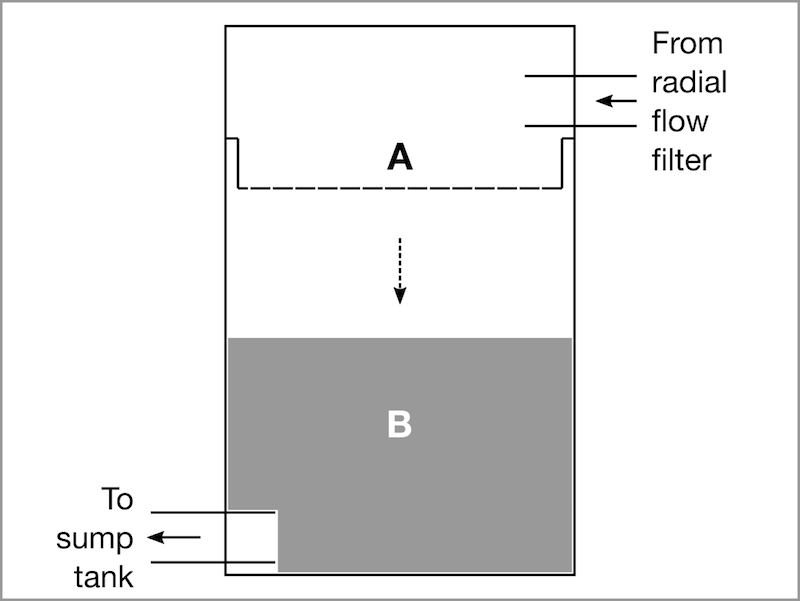
For the solid filter, I’ll use a radial flow filter method, where water will flow upward then directed downward by some barrier which will settle the solid waste at the bottom of the bucket. I’ll add a drainage outlet to clean out the filter, and this waste later will be collected into mineralization tank. Water overflow from the solid filter go to bio filter tank.
This bio filter will serve multiple purpose. Primarily is for bio filtering activity, where bacteria will convert ammonia in the water into nitrate. Another is to further collect fine solid which couldn’t be filtered by solid filter. And lastly as a degassing component, which is to remove excess nitrogen, carbon dioxide or other harmful gas in the water. All these can be achieved by using trickle filter method.
Sump tank is the central, and the lowest point (in term of altitude) in the system, where all the water will be collected and distributed back. Here is where the 2000 liter per hour (L/h) water pump will be located. It also has overflow outlet, because the DWC will be exposed to rain and this allow the excess water to go outside.
Based on the diagram, the pressurized water line will be using ½ inch PVC pipe and gravity-fed water line will be using 2 inch UPVC pipe. I put a split flow from sump tank to fish tank and DWC units, and each inlet has valve for better water flow control and maintenance.
Mineralization tank is the only component that is separated from the system. Here, solid waste from solid filter will be collected here at least once a week, then it will be aerated to release the micronutrients, and then will be put back into the sump tank after 1 or 2 weeks.
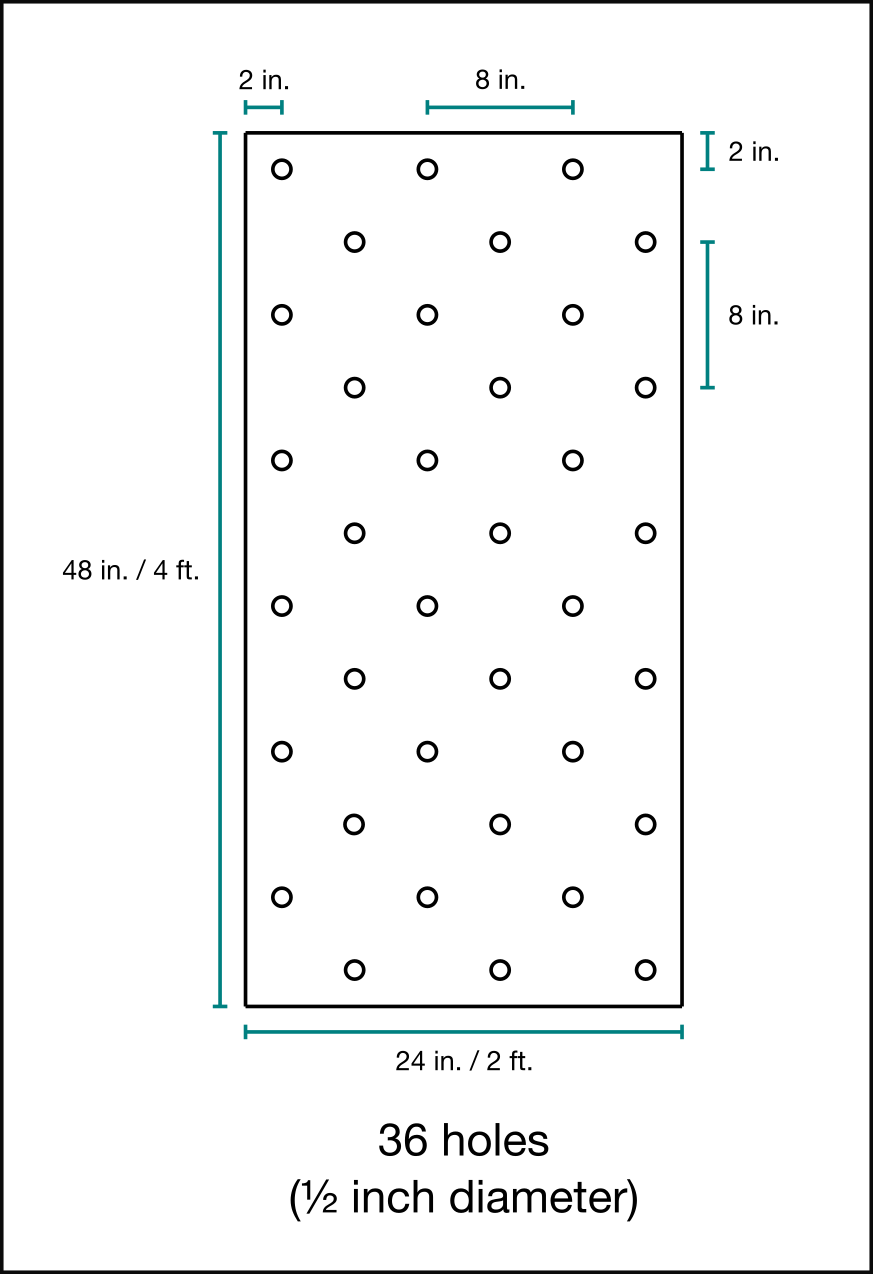
Sytrofoam board design
For the styrofoam board design, I choose this design because it provides more holes than the simple rectangular design. I’ll have 6 of these styrofoam boards per DWC, so a total maximum of 648 plants can be planted and harvested at a time from this system – way more than what I can achieve when doing soil-based growing.
Regarding the growing schedule, when using soil, I could harvest the veggies after 8 weeks from germination, so by using aquaponics, hopefully I can half the duration, to 4 or 5 weeks. For germination, I plan to sow the seeds using wet tissues inside germination tray for 2 weeks, then transplant them to the DWC and by using sponge to hold it in the board holes – no net pot is used (to save cost).
There are a lot of rooms for improvement to be done, and I’m thinking about automation and operating it off-grid. Later on I plan to get automatic fish feeder, or maybe look into software-based solution using microcontroller such as Arduino or Raspberry Pi to automate the fish feeding process, measure water quality, and also to automate draining solid waste from filter into mineralization tank, and put it back into sump tank. In the future, I’m looking into setting up solar panel and backup battery to power the pumps and also the automation machines used later.
Chicken brooder and grazing box
4 April 2018
Building chicken coop – week 3
20 Mac 2018