Aquaponics germination station
Isnin, 3 September 2018, 6:00 pm
In this post I’m going to go through the process of building my aquaponics germination station, materials used and shop where I got them from.

I’m using 5-level metal boltless rack for this germination station, aquarium size 1x2x1 ft (WxLxH), and two car boot tray (15×32 inch) which surprisingly all of them fit well.
I bought this rack from DC Rack at Jalan Green. They have variety of racks at reasonable price, so it’s highly recommended.
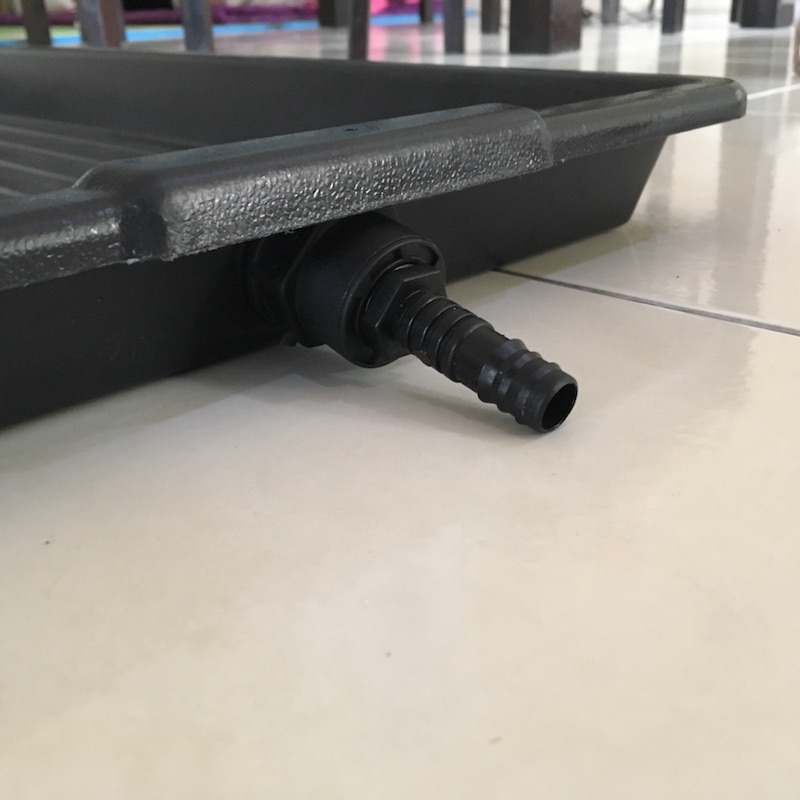
For the outlet at the car boot tray which acts as the grow bed, I’m using ½ inch HDPE tank connector, fitted with ½ inch to 16mm connector. For the hole, I drilled it using 22mm hole saw.
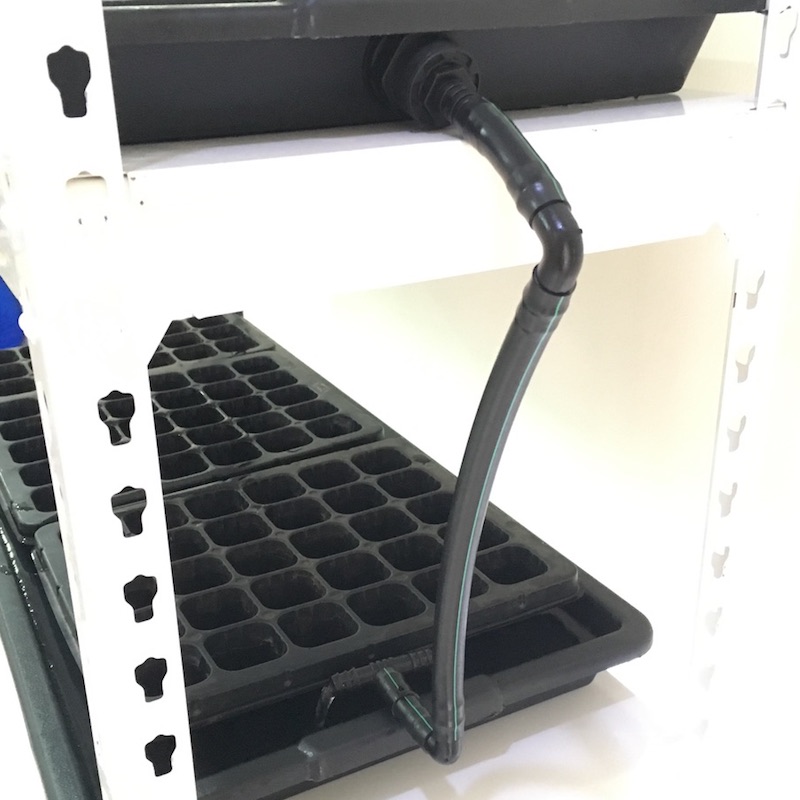
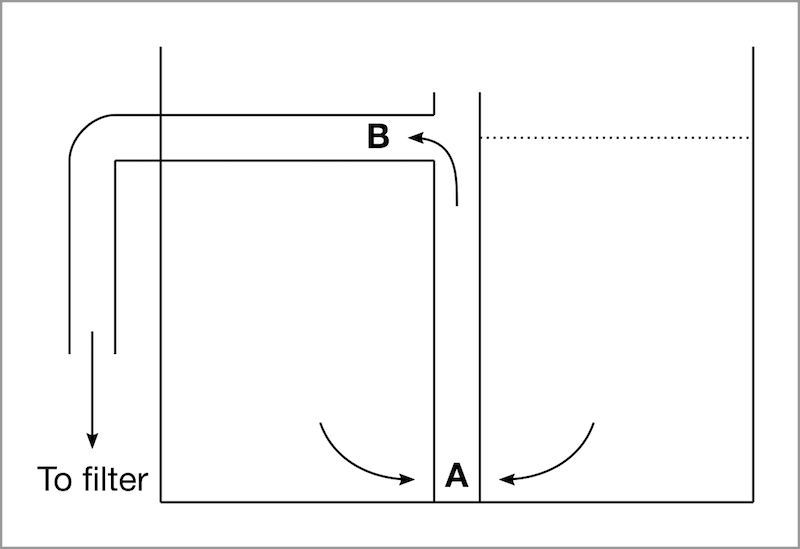
Here’s the connection from the top grow bed to the below one, using 16mm HDPE pipe. At first I connected them directly without elbow, but the pipe bends and disturb the water flow, and also it look messy.
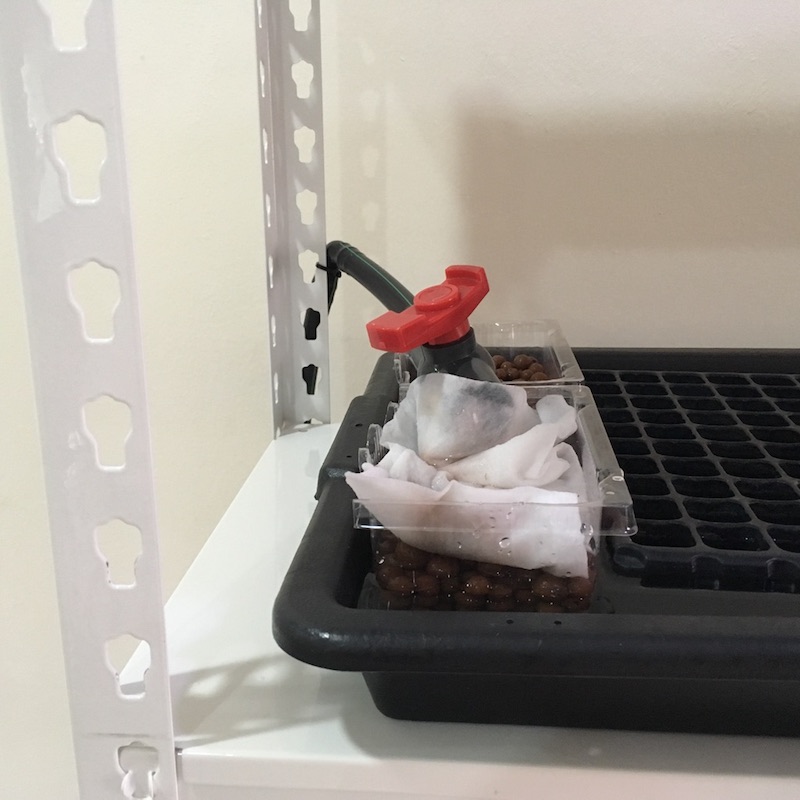
Here’s the line from the water pump inside the aquarium, with ball valve to control the water flow. I put some cloth there as a mechanical filter, and some clay pebbles or hydroton below which act as biofilter, where it provides surface area for nitrifying bacteria to colonize.
Ball valve is extremely important here to control the water flow. I have to match the flow rate of water that coming into the grow bed, which is under pressure, with the flow rate of water that coming out, which is by gravity. If the water coming in is more than the water that coming out, the grow bed may be flooded and water level in aquarium may dry out.
On the other hand, the outlet pipe should be clear of any debris as it might slow down the water flow, which again may cause the grow bed to flood, as it only depends on gravity.
All of the 16mm elbow, tee and connector I use here were bought from Garden Hobbies Collection near Emart Matang, while the tank connector I got from SK Hardware, and the pipe was ordered online, but it also can be bought from the gardening store mentioned earlier.
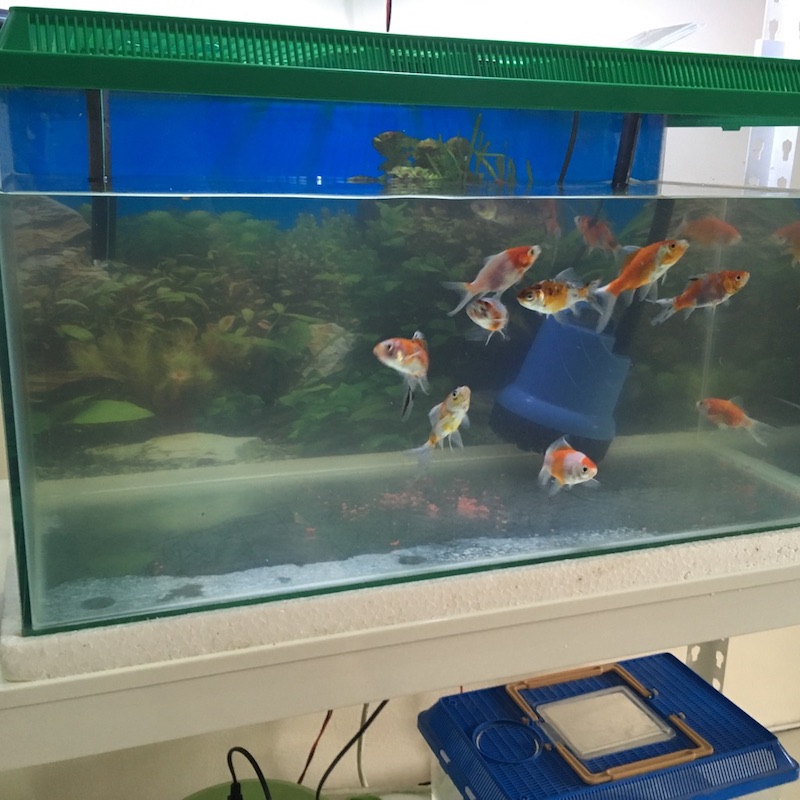
Water pump I use is a 20W, 1500L/h with 1.6m head, and it has a matching 16mm outlet, which I got it online. It sucks water from the bottom, so it’s useful to clean up the fish poop at the bottom of the aquarium. The fish we have here is shubunkin goldfish, 15 of them, but we also have ikan puyu (climbing perch) below there, which we have initially, but it can’t be mixed with the shubunkins because it might eat them.
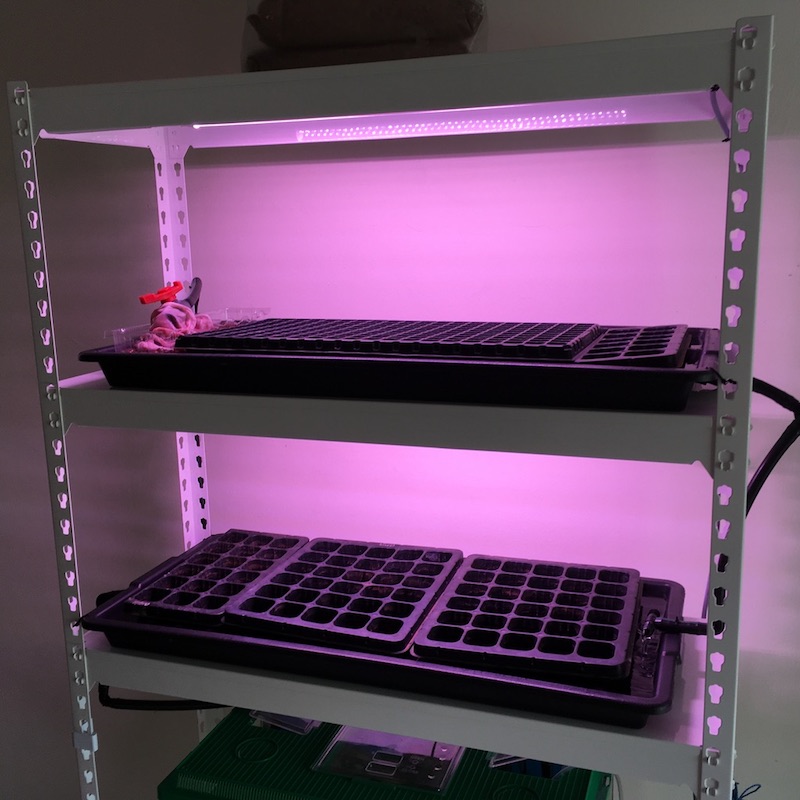
Germination station now installed with T8 LED grow lights (2 ft long), one for each level. The light has to be at least 30cm from the plants below, thankfully by using boltless rack it’s easier to adjust the rack levels.
I bought these grow light online, and for those who plan to buy them, make sure it matches your electricity voltage and current type. This grow light supports 85-265V AC (alternate current), and here we have 240V, so it matches. If the product stated DC (direct current), it only support electricity from batteries or solar panel, or you need to use adapter (to convert AC to DC) if you want to connect with your home electricity system.
This LED grow light emits blue and red colour lights, essential lightwave for plants to perform photosynthesis. Alternative to this, is by using regular light bulb, but by mixing the cool day light and warm light, to provide the full light spectrum needed by plants.
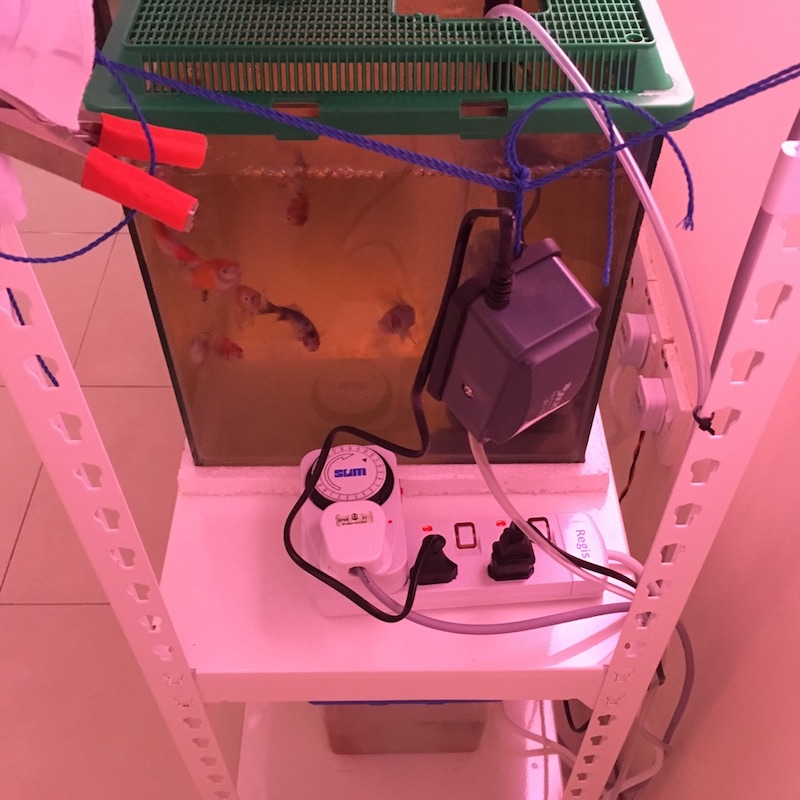
Here’s the electrical part. I’m using 3-plug extension wire, to connect the grow light, aerator and water pump. I put a timer on the grow light, set it to turn on from 6.30am to 6.30pm, while pump and aerator are switched on all the time. The aerator has to be suspended over a rope as shown above to reduce the vibration noise. Similarly, the air stone shouldn’t sit on the aquarium base as the vibration will produce more noise.
Aerator is needed in this setup to provide extra dissolved oxygen, not only for the fish but also for the water that get pumped up to the grow bed, to prevent root rot. There’s also another LED light above the aquarium, which we turn on only at night, and it provides nice view of the fishes inside the aquarium.
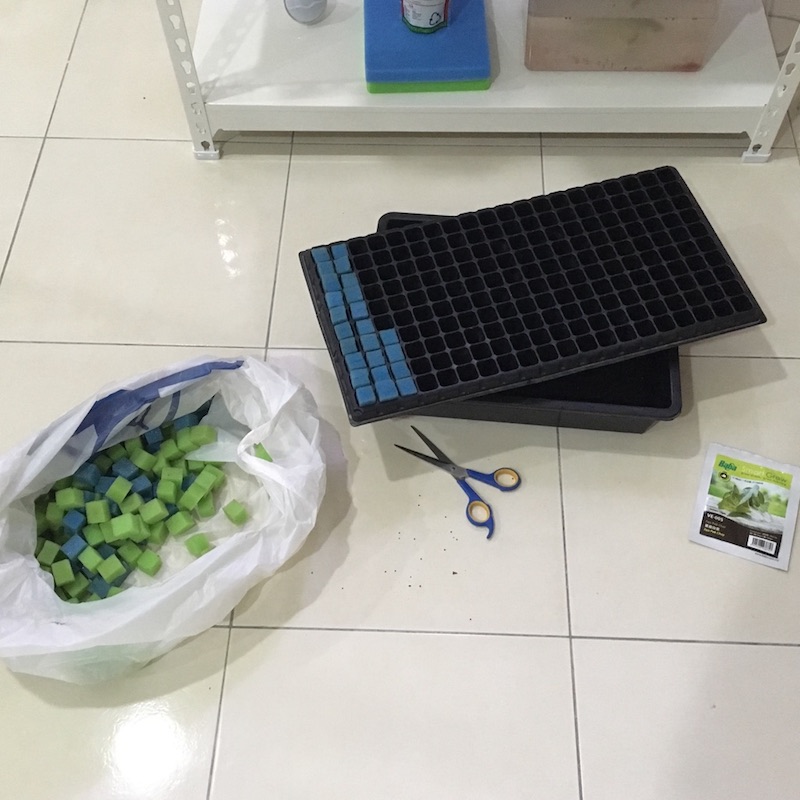
Sowing method shown here is using sponge cube, cut in half so that seeds will be clamped inside when fitted into the germination tray. This is to make it easier to take out the seedlings during transplanting later. This method is suitable for leafy greens.
Another method is using cocopeat – spray it with water to wet it a bit, then fill it into the germination tray with larger hole, poke a tiny hole at the cocopeat then put seeds in there. This method is more suitable to larger type of plants, which take longer time to germinate & have larger root system.
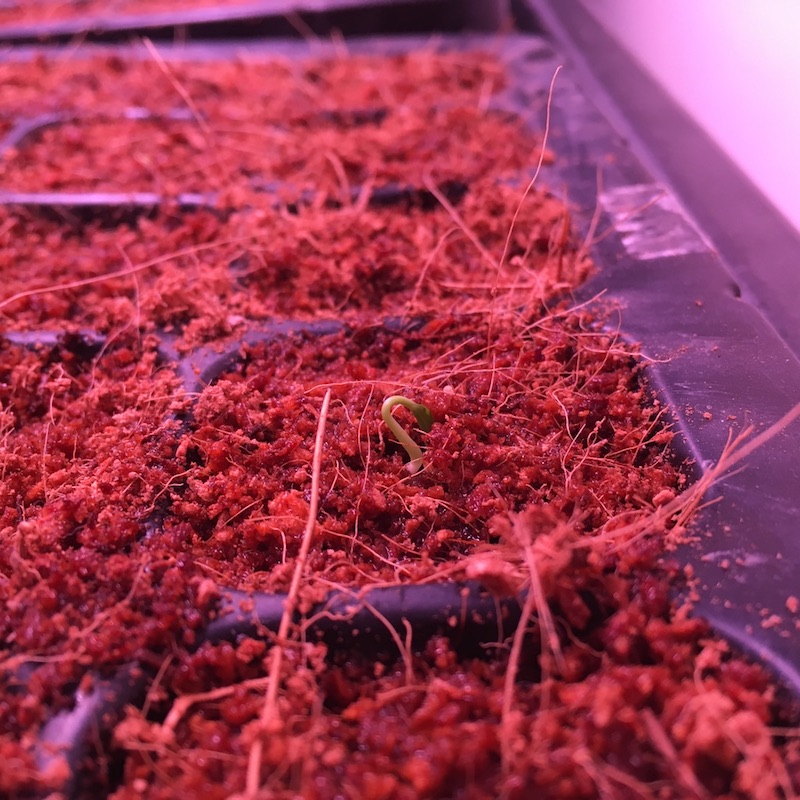
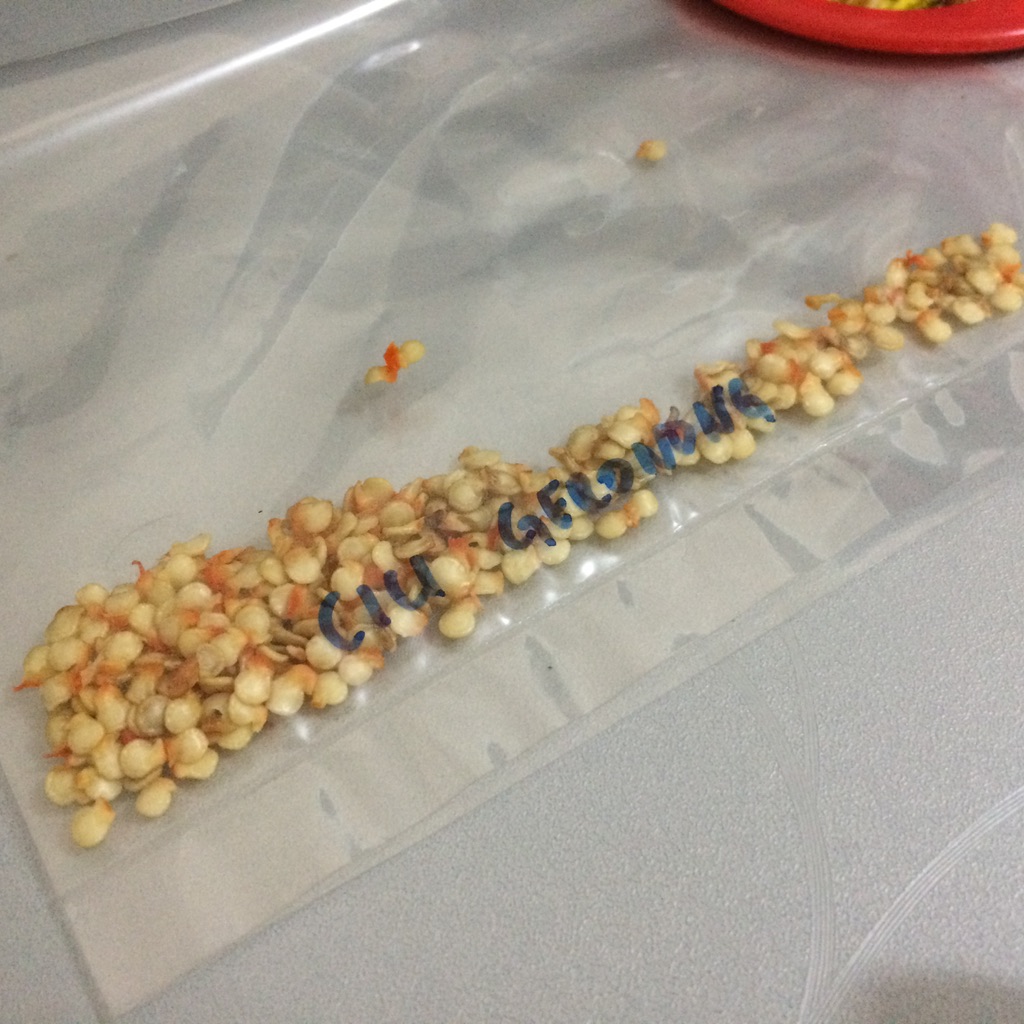
This is cili geronong, after one week sowed using cocopeat, now already starting to germinate. Problem with using cocopeat is that it cause the water inside aquarium to turn cloudy and dirty.
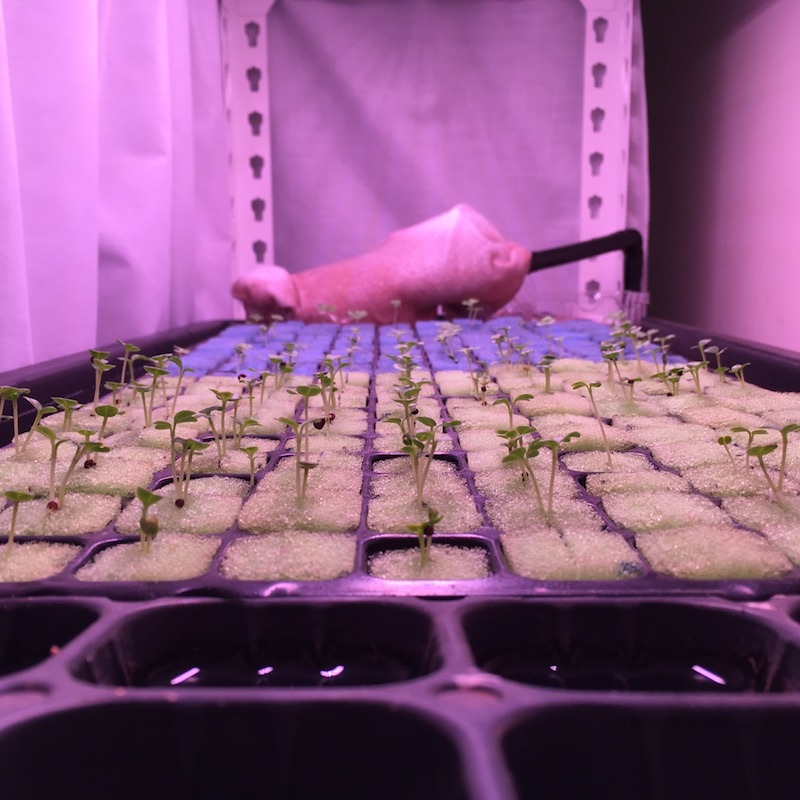
The blue sponges are pak choy while the green ones are sawi putih (white stem choy sum), also after a week. At back there I change the filter with coffee strainer, which work quite well, except that it doesn’t allow high water flow rate and sometimes it overflow from the opening of the strainer.
We cover the grow bed area with cloth because the glare from the grow light is unpleasant to our eyes, and since this germination station located in the living room, we’ll see it often as we pass by and we want to reduce this disturbance. This cloth also need to be held together using paper clip because when there’s wind coming in, the cloth might flapping around and land on the grow bed or in the water.
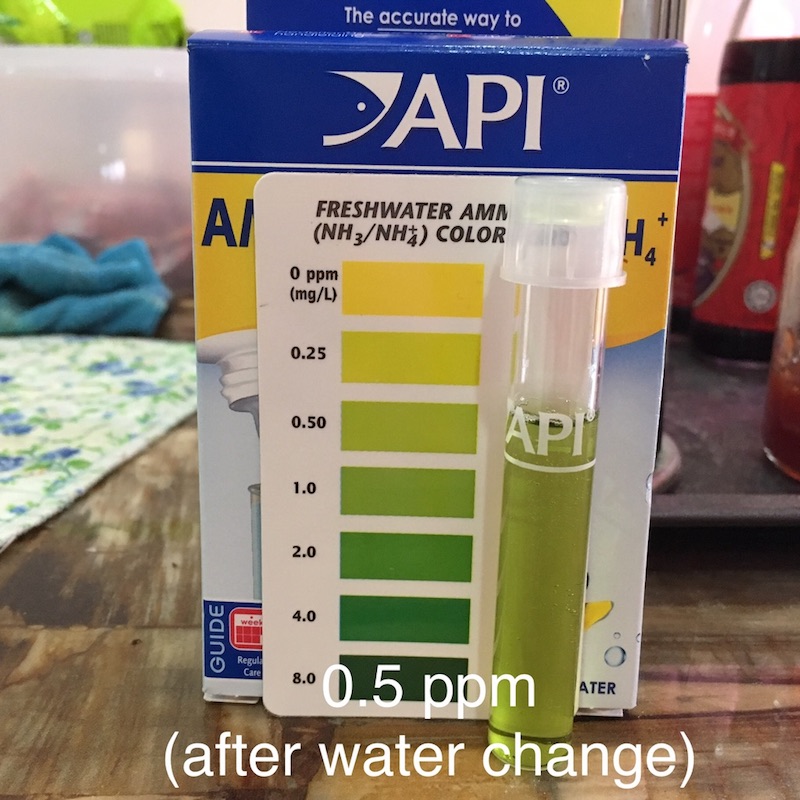
To check the water quality, I’m using this ammonia tester. I try to keep the ammonia level below 2.0 ppm, and if the level stay high, I’ll change the water. Murky water caused by the cocopeat doesn’t affect the fish much, but if causing problem like the fish can’t see its food, then I’ll do a water change too.
I don’t have the full test kit, so I can’t verify if the system is already cycled – by checking for presence of nitrite and nitrate. It’s already been around more than two weeks, based on online reference, it may take up to 2 months for the system to be fully cycled.
So far, the routine we have done is to feed the fish 3 to 4 times daily, each time with a pinch of feed. And every day I’ll take the ammonia level reading, and if the level stays at 2.0 ppm for two days, then on the third day I’ll do a water change. Note also that I use harvested rainwater for the water inside this system. Other than that, we don’t have to worry much about the plants as they grow by itself with enough light, water and nutrient.
Aquaponics germination update September 2018
28 September 2018
29 Ogos 2018